Quick Setup - Vault Vision
This Vault Vision setup will get you up and running with a local web application where you can experiment with all the flow and integration points.
Create an Account at Vault Vision
Navigate to Register and create an account.
Use the getting started wizard and create a tenant with a default application
Navigate to Getting Started and create a tenant and application.
First you will need to choose a name for the url for your login and registration pages. Pick a name for your tenant address, use our vvkey.io address or a custom domain with our Professional Plan (Free 30 day trial).
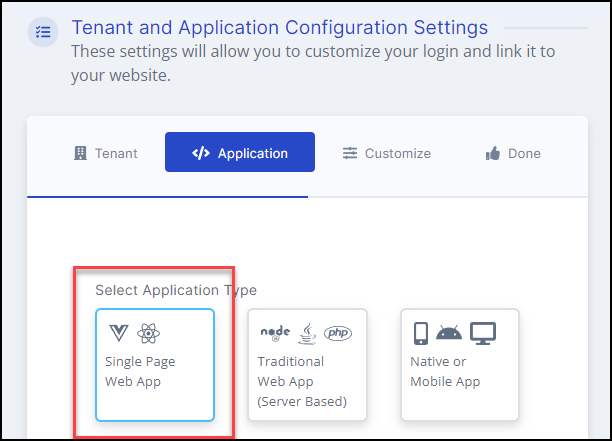
You can accept all the defaults, although you will need to give your tenant and application a name. The name can be anything, it’s only purpose is to help you distingish it later when you have multiple tenants and applications.
Note
For these default local applications make sure you select ‘Single Page Web App’ as the Application Type.
Option 1 create a React Application with our React js boilerplate
clone this github repo containing our React js boilerplate project https://github.com/vaultvision/react-boilerplate-vv
Copy over the env vars from the Vault Vision Management Panel into a NEW .env file located at the root of the project. You can copy this file as an example https://github.com/vaultvision/react-boilerplate-vv/blob/master/.env-example , or simply rename it .env and populate it with your correct env vars.
Run the npm start command to launch a local instance
npm run start
Option 2 create an application using our HTML boilerplate
clone this github repo containing our HTML boilerplate project https://github.com/vaultvision/html-boilerplate
Copy over the env vars from the Vault Vision Management Panel into one of these files: https://github.com/vaultvision/html-boilerplate/blob/main/src/scripts-init/oidcAppRouter.js or https://github.com/vaultvision/html-boilerplate/blob/main/src/scripts-init/oidcbinding.js
Run the npm start command to launch a local instance
npm run start